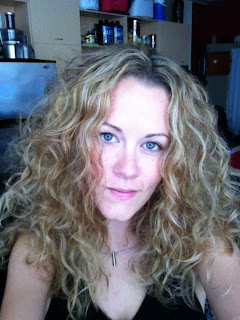
Monday, August 13, 2012

Lily B Ultra Eye Cream!

Lily B Multi-Action Rescue Ultra Eye Cream

I never know how to pick a good eye cream.  There are so many on the market, prices vary from single to triples digits for the tiniest amount of product, and every cream/gel/serum always makes a bazillion promises that most don't ever live up to.  Luckily Lily B lives up to its promises and does it while using all natural ingredients designed specifically for the delicate eye area and for all skin types including those with sensitive skin.  Below is a list of ingredients found on Bloom.com and the description of how all these natural ingredients work together to create the ultimate eye cream.

How It Works:

  • Jojoba oil, a botanical extract known to have similar qualities to human skin oil, is non-comedogenic and provides skin balancing and skin moisturizing properties.
  • Squalane, extracted from olive oil, it is also a component of human skin and a powerful antioxidant and skin moisturizer.
  • Vitamin K helps to reduce dark circles under the eye.
  • Arnica montana, a flower possessing natural anti-bacterial and anti-inflammatory properties, helps to reduce eye puffiness.
The texture of the product is what I love most.  The cream is very thick yet lightweight and you can tell it absorbs into your skin rather than sitting on top like some heavy moisturizers.  It is also not sticky or greasy but a nice creamy consistency.  You only need a small amount to go a long way with this product.  I pump a tiny, less than pea sized, amount onto my ring finger and dab lightly under the eye and around onto my lid and brow bone.  I do this twice daily, morning and night.


My picture below were taken in different lighting but I think you can still tell the difference from the pre Lily B use to the current photo after about 3 weeks of use.

Before Lily B and w/3 Weeks Using Lily B

Overall the price tag of $42.50 for a .5oz bottle of Lily B is definitely worth it.  It is comparable in price to many other eye creams on the market but it actually delivers.  Join me on Bloom.com and get updates on the latest fun beauty trends and the chance to interact with other women like yourself!

Tuesday, August 7, 2012

Dr. Dennis Gross Skincare Face Peel

Dr. Dennis Gross Skincare Extra Strength Alpha Beta Daily Face Peel is an at home peel with higher concentrations of Alpha Beta® Acids and anti-aging boosters.


Below is a list of ingredients from the 2-step process from Bloom.com.

Step I – Alpha Beta Refining
  • Glycolic acid reduces visible signs of aging.
  • Lactic acid promotes cell renewal; fights wrinkles while exfoliating and moisturizing.
  • Malic acid promotes cell renewal; fights wrinkles while exfoliating and moisturizing.
  • Citric acid helps speed up cell turnover/cell renewal.
  • Salicylic acid helps lift and remove the blackhead or waxy plug that is clogging the pore.
  • Genistein stimulates collagen production and diminishes its breakdown.
  • Chamomilla recutita soothes and calms irritation.
  • Green tea extract is a natural antioxidant that may reverse sun damage.
Step II– Enriched Neutralizing System
  • Retinol has proven anti-aging effects on skin.
  • Green tea extract is a natural antioxidant, may reverse sun damage.
  • Phospholipids are natural substances that draw moisture from the air and seal it into the skin.
  • Sodium bicarbonate neutralizes acids.
  • Vitamins A, C, and E ingredients are potent antioxidants that prevent collagen breakdown.
  • Genistein stimulates collagen production and diminishes its breakdown.
  • Yarrow extract is a natural toner with anti-inflammatory properties.
  • Ubiquinone is a powerful antioxidant that neutralizes harmful free radicals.
  • Resveratrol is grape-seed polyphenol that protects skin from premature aging.

I wish I could tell you I experienced all of these things during my five day trial of the peel. Unfortunately I didn't see much for anti-aging and it gave me extreme redness. However I do live in California and it is possible the peel made me burn easier. The directions specifically say to avoid the sun and wear protective SPF, which I did as much as possible. The packaging also states to avoid products containing alcohol after use. I am in the middle of sampling the Nia 24 depigmentation serum which contains alcohol so I took a break from that during my trial. As far as I could tell my nightly lotion and eye cream does not so I continued with my normal product use for moisturizers.

Using the 2-step process

I really liked how easy the product was to use. Just two individually wrapped cloths that you use as labeled. Cloth #1 rub on your face in circular motions starting with your forehead and working down to your neck until cloth feels dry. Repeat same procedure with cloth #2 about 2 minutes later. Follow with your normal skin routine but watch for the alcohol in your products! Easy breezy.

Before and after Dr. Gross peel

I don't have the best picture skills and uneven lighting may not give the best detail for my before and after pics. Like I said though you can see redness on the right but I feel it was actually much worse in person. No real difference in anti-aging but I did feel my skin was getting softer each day. Now about one week later I have breakouts all over my forehead and hairline near my temples. I don't know if this is from the peel or if it is from stopping and starting the Nia serum or just summer in general. I won't count it against the peel review since I have so much going on outside of its use.

Overall I'd say I would like to try this product again. I don't know if it is supposed to be used in 5 day increments or for a full 30 days. If so I would love to give it a shot longer than the five days I tried it for. I don't think I gave it a fair chance to work all of its anti-aging magic on me and I think in time with use my skin would adjust and the redness would decrease. I did feel my skin was softer after using and I really liked that it took no time out of my day to use.

You can follow me on Bloom.com and try the Dr. Dennis Gross Skincare Extra Strength Alpha Beta Daily Face Peel for yourself!

Peptide Polish

This month Bloom.com sent us Bloom Ambassadors Dermelect polishes, fun bright nail polish colors just in time to play with before summer ends!

Below is a pic of the colors Dermelect has available along with the three colors I received. I have to say I lucked out because if I could have chosen the three polishes I would have picked exactly the same!


Dermelect Pros
  • Free of DBP, toluene, and formaldehyde
  • Infused with ProSina, a pure peptide protein extracted from sheep’s wool
  • Strengthens nails and adds flexibility
  • Fast drying and long lasting
  • Great colors!
Dermelect Cons
  • Very sheer, takes several coats for a solid color
  • $14.00/bottle is a little pricey for polish
  • My bottle caps fell off!
For me the pros outweigh the cons and if your nails are damaged and in need a mani, its worth the splurge. It's cheaper than going out to the salon and you get a dose of nutrients to your nails in the form of awesome lasting color that's free of nasty chemicals. Below are pics of some of the fun I had with the polishes.

All colors w/two coats of polish


Sponged Head Turner & Power Trip

Above It w/added glitter

Head Turner & Power Trip w/an orange pearls bow
Above It w/1 coat and 2 coats of polish
Both bottles caps fell off!
I also used Above It in my marble for my Jaws nails.


Follow and join me at Bloom.com here!

Saturday, August 4, 2012

Shark!

Ahhhhhhhhhhhhhhhhhhhhhhhhhh ...... Shark Nails!
This is a great way to celebrate summer and a trip to the beach with Jaws themed nails!

1st I painted my nails w/ a base of white then added a coat of OPI Into The Night from The Spider-Man Collection.

Then I did a water marble of Sally Hansen White On and Dermelect Above It, a bright sky blue color. I wanted a watery wave effect on my nails and this worked out great!

Marbled Waves Colors

I left one nail on each hand blank to paint the shark.

To get a triangle I taped off my nail and painted it grey with NYC Sidewalkers.


I outlined the triangle in black, Sally Hansen Black Out, and added dots for the eyes using a tiny paint brush. (My nail art tools are usually improvised.) I filled in a half circle at the tip of my nail in white for the teeth and painted a coat of red, Sinful Colors Ruby Ruby, inside the white and shaped the teeth by pushing the red outward with a toothpick. I'll add picks of each step when I do this again. I was way too caught up in the project and skipped a few pics.

Shark Colors

Overall this is how the finished product looks topped with a coat of OPI Top Coat.


Love this! So fun for summer and beach time!

Friday, August 3, 2012

Vegan Cauliflower Crust Pizza

Yummmm! I tried this 'pizza' to attempt to curb my cravings for Domino's! I am an addict. I can't get enough of the build your own pizza, regular crust with marinara, cheddar, provolone, mozzarella cheeses and topped with black olives and jalapenos. It's the best pizza in Los Angeles. As a native Chicagoan I've been spoiled growing up with the best pizzas and now living in LA nothing even comes close. As a new vegan I'm desperately trying to keep cheese out of my diet, meat hasn't been an issue, ice cream and cheese however are very difficult to cut out. I do plan to have occasional cheats but for the most part I'd like to eliminate it so I gave this vegan pizza a shot and it was quite yummy.


Step 1: Chop up 2 cups of organic cauliflower into tiny bits or to save time use a food processor. Next spread the cauliflower out onto paper towels and pat it with extra towels to pull out some of the moisture.


Step 2: Make your 'egg' mixture. I used 3 tablespoons of Flaxseed Meal with 9 tablespoons of hot water. 1 egg is 1 tablespoon with 3 tablespoons hot water. Add this to your cauliflower to make the dough.


Step 3: Add any seasonings you'd like to your crust. Sea salt, pepper, garlic, Italian seasonings are all great additions. Spread your dough into a circle on whatever surface you plan to cook on. I don't have a pizza stone so I used parchment paper on a baking sheet.


Step 4: In a 425 degree oven cook your crust solo for about 30 mins. You want it somewhat crispy, cook longer if it isn't. After the time is up I flipped my crust and spread on the toppings. Be creative! Use whatever you like, I did marinara sauce with red pepper flakes and vegan parmesan cheese, which I found has casein, the not so good for you protein found in milk. Watch for this if you plan to use a vegan cheese, with enough tasty toppings though you won't even need it and if you aren't vegan go ahead and use your fave cheese.


Step 5: Return pizza to the oven with toppings and bake for 5-10mins. Watch the crust for burning! I topped my pizza with basil after this step and it was delish!


Below is another example of cauliflower pizza with toppings of zucchini, broccoli, kale and vegan chipotle mayo instead of marinara sauce. I rubbed the kale with olive oil and sea salt as if I was making kale chips. Also turned out great!


Enjoy!

Wednesday, August 1, 2012

Going Coconuts!

Sundari - Neem and Coconut Hair Treatment Oil

Full Size Neem and Coconut Oil 3.4oz $34.00

The label itself reads 'HEALING' and there couldn't be a more perfect one word description of the product. I have dry, damaged, colored hair that is hard to maintain and for sometime now I have been using the Sundari treatment to quench my thirsty curls and heal my dry scalp. I have even recommended the product to several friends and family members who suffer from the same problems. Lets get real though, every girl is guilty of over styling, over processing, and even on best hair behaviour you can't escape environmental damage. Sundari does its best to protect against all that, a hair superhero in a bottle.


Sundari oil is made from natural and organic ingredients to battle dry scalp, prevent hair loss, and protect against damage from heat styling. The treatment is meant to do weekly but I do it as needed, which varies from 2x per week to once a week to monthly depending on season, coloring, or my budget : / etc. When broke Bloom.com offers samples with every order so when you are picking up your beauty essentials you can always toss a sample of Sundari into your shopping bag for free! I grab a sample with every order, I'm a sample fiend! I bring one with me whenever I travel and I've passed a few out to family to try.

Sample Pack - 1 Use

Be careful when you use the product it is very thin and runny so you may want to have a towel over your shoulders or a tee or tank you don't mind spilling on. You won't need a lot of the oil either. I have a lot of hair but I focus the oil mostly on my scalp, massaging it in, then run my fingers through my hair with the excess oil. The treatment calls for 30 minutes of use, I've used it for the 30 minutes threw my hair up on my head and gone about my day then rinsed it out and I've used it before bed and left it on overnight. I didn't notice a real difference in results with the 30 minutes use vs. overnight use so if the 30 minutes is difficult for you to track then toss it in before bed and shower it out in the morning.

Sipping Coffee Waiting for My Oil to Soak!
Not Pretty Looking On!

Overall I love the way the Sundari Treatment makes my hair look and feel. When you are looking in the mirror at frizzy, dry, flaky hair its refreshing to know a product like Sundari is there to revive lifeless hair.

Shiny Sundari Hair

WOW big hair little body! I look like Cousin It in this photo! Light curls and lots of shine with little styling, love it! This was taken after I had left the oil on overnight. A few days in the sun left my hair dry and my scalp burnt, I felt it needed the extra treatment and I think it worked out nicely!

T'eez Me P'leez

My Bloom Beauty Ambassador Box was AWESOME once again! This month was extra exciting because there was finally a product for us curly haired girls. T'eez Bounce Me Styling Cream and Build Me Volume Spray.


My normal go-to product for my hair is Ouidad Heat and Humidity Gel paired with DermOrganics Argan Oil then I air dry or diffuse before going out. With the T'eez I didn't feel the need to add in the Argan Oil and my hair looked great! I tried the product out in several different ways which I will play out for you below.

1st look I tried out was on wet hair, not shampooed ( I only shampoo about every 3rd day). For each look I used about a quarter sized dollop of product. On wet hair I combed product through with my fingers and flipped head over to scrunch it all in. I then diffused my hair and once it was slightly dry I sprayed in the Build Me Volume Spray and continued diffusing until hair was dry. I finished it off with a quick spray of  Sexy Hair Stay N Play Hairspray.

T'eez Bounce Me and Build Me Combo Diffused
Bounce Me and Build Me

Later in the day I added some argan oil, flipped, and rescrunched my hair, added the part and went out with fresh curls.
With added Argan Oil in my hair

For my 2nd look I used only Bounce Me Styling Cream and lightly diffused my hair, NO Build Me. I have a LOT of hair, even with a good chunk missing on my shaved side and didn't think I really needed the extra volume.

Bounce Me Styling Cream Only

You can see there is less volume but still a good amount of curl with little to no frizz! With my hair I think the volume spray is only needed for BIG nights out, for everyday use I like the Bounce Me look by itself.

I have yet to try it to straighten my hair, but honestly straightening my hair is something I don't do too often because it takes me forever with this mop!

Overall I am very impressed and super happy about the T'eez products. I plan to keep using the Bounce Me, 6oz for $22.99 is a great price, especially since a little goes a long way. The Build Me Volume Spray I also really liked but it's a product my hair doesn't really need, a once in a while splurge, it can be very beneficial though for girls who have fine or thinner hair.